I have recently found a page on servicing the Lego RCX 1.0 supplied with the Lego Mindstorms RIS kit.
Bob Fay, a regular poster to lugnet.robotics has created a short guide to opening up and cleaning the brick, with a few warnings that “this procedure is at your own risk”.
However - if you are finding that your RCX buttons or IR port are not responding properly, and could be a bit grubby after a few years of (mis)use, then this would be a worthwhile project. Its probably worth setting aside a full Sunday afternoon with no distractions to do the job properly.
His guide is designed primarily for the RCX brick which came with an external power supply plug, but may also be usable to some degree with the others.
Tools
You will require the following tools:
- Small Philips Screwdriver
- A thin flat edge (you could use your fingernail as he suggests also)
- A flat surface, i.e. a well lit work desk
- Some Q-Tips (or cotton wool buds)
- Tape Head/CD cleaner or similar alcohol based solvent (isopropyl alcohol)
Also it is advisable to wear Safety goggles, as the plastic may snap or the push-button springs may ping up.
Update 2014 - Since the original has gone - including the images, here are the steps with some of the images (credit to Bob Fay - restored via the Wayback machine).
Warning - review all of this, not all the images were cached. If you are able to source the missing images (they aren’t in the wayback machine, I tried), then please let me know.
Note
This information relates to the RCX 1.0 with external power plug. The purpose of this service is to repair lost connections to the battery and or failure of the control buttons on the RCX. The following is a delicate procedure and must be performed with care.
USE OF THIS PROCEDURE IS AT YOUR OWN RISK
step 1
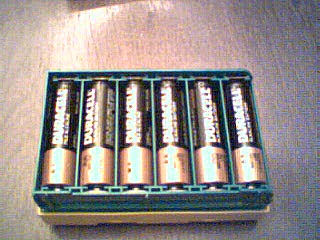
Remove the Dark Grey cover and the batteries.
PRESS THE RED ON/OFF BUTTON TO DISCHARGE THE BACK UP POWER.
step 2
Remove 4 Philips head screws.
WARNING! DO NOT try to remove the battery compartment now.
step 3
image missing
Remove the IR lens. Insert your fingernail at the top of the lens between the lens and the top of the RCX.
There are three tiny studs on the bottom edge of the lens that engage the holes in the battery case, so the case will have to be raised a small amount. The lens will come loose.
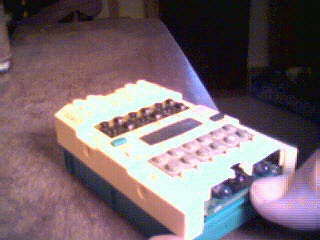
Place the RCX on a flat surface hold the top edge of the pc board and lift the front edge of the control panel upward.
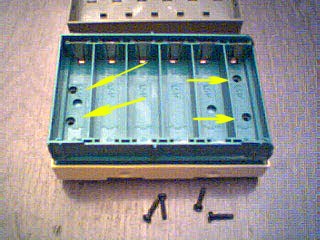
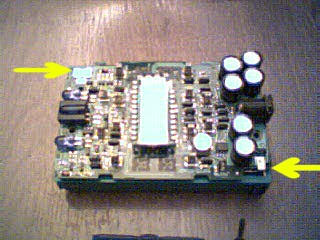
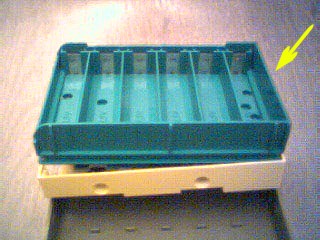
step 4 - Separating the control panel from the pc board/battery case assembly
Note the arrows point to the spring contacts that connect the pc board to the battery power. Also note the spring contacts that connect the pc board to the control panel.
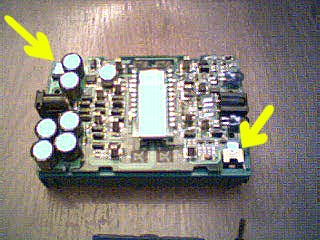
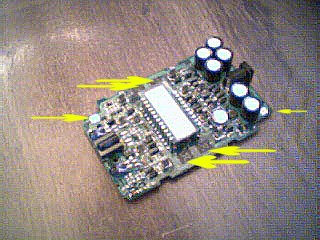
Step 5
image missing
Note: The upper arrow is pointing to typical lugs to connect the pc board to the control panel. The lower arrow is pointing to a typical conductive segment in the control buttons.
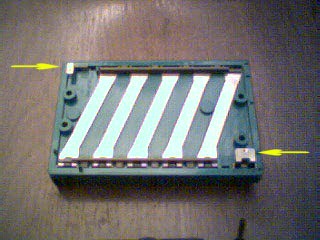
Step 6
Carefully move the right end of the pc board upward just far enough to clear the small battery contact at the bottom right arrow.
The board can now be tilted to remove it from under the large battery contact at the left upper arrow.
Step 7
Gently clean the above marked surfaces with a Q-tip moistened with TV tuner cleaner or video head cleaner. Also clean the conductive surface shown in the control panel buttons.
Step 8
Gently clean under the two battery connections.
These connections should be bent slightly downward to ensure a tight connection with the pc board circuit.
Step 9
image missing
Be sure the pc board stand-offs are in their proper positions.
Reinstall the pc board under the large contact first and then under the small contact. Check to see that there is sufficient spring tension to make a good contact with the pc board circuit.
Step 10
Place the control panel face down and install the pc board assembly starting at the external power end gently pressing the assembly into the control panel.
Install the lens for the IR diodes. Replace the four screws and batteries and the battery cover. Hit the start button to confirm operation. Load the firmware and check.