Basic Grabber
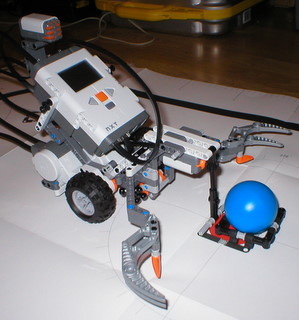
Time to get started on adding a grabber to the Tribot. The Tribot with a grabber is one of the demonstrations seen in many of the images on the net in the run-up, along with Alpha-Rex (which I will be building later).
It was a fairly simple build on top of the touch sensor Tribot, although having seen a version of this with the UltraSonic - the touch sensor seems a bit primitive. I also must admit it is good seeing a sensible use for the 32072 - Technic Knob Wheel - a neat way to deliver movement at 90 degrees without the complication and non-compliance of a worm gear. A lot of lash, I will grant, but easy and cheap. Unfortunately, I got no photos of the robot at this stage, and was too enthusiastic, moving right on the the sound sensor.
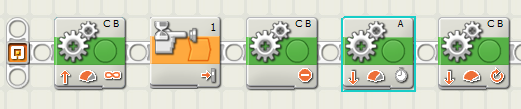
Now to program it I again just followed the tutorial, getting into the swing of things. I run the program, and find it suitably fun…
It is a bit aggressive - and knocks the stand around, almost catching it in the grippers. After it reverses, for no apparent reason, the grippers open on braking. I didn’t program that behaviour…
After three runs, it breaks - the sensor/grabber module pops off, during the force of the grab. I think power 100% (as suggested) might be a bit much… So I make good my repairs and try the slightly less violent grab (75%)… It also seems the grabbers are a bit low, and occasionally grab the stand for the ball also.
At first I thought the gripper opening could be down to switching from brake to float, thus loosening the grip - but then in float, I can simply turn the gear and get a good grip on the ball. The motor does make a noise as it opens - so it sounds like an active action. Maybe I should start thinking about checking for those updates…
Selecting Help->Online updates should kick things off, although many recent programs like Firefox and iTunes will do this check for you upon starting. Hopefully the update will have an update checking startup built in. This option just loads a link in FireFox, to a download page. I see nothing there related, but may come back at some point for the mini-block and legacy libraries. When I start doing BlueTooth things (all via USB at the moment), I don’t doubt that I may need the firmware update there…
Sound Sensor
The next thing to add is the sound control, not the UltraSonic, but a simple clap register. It is at this point I would like to start using BlueTooth, but since my BlueTooth USB dongle for the laptop is currently buried under other gadgets somewhere, I will have to give it a miss for now. I will write about it once I find the thing… Not that you could ever have too many gadgets though!
One thing I now have to say in defence of the studless style, is it tends to keep sensors better attached than the studded style would for the same given space. Granted that they are not as rigid, but they seem to look like they would stay on better. After fitting the sound sensor, I am now quite worried about the strain it will put on the non-booted RJ plugs. However - being RJ - they may be fair simple to crimp, and much more easily interfaceable than the older Lego studded connector.
I started the program, and made the additional change of making it wait for a loud noise to start as well as to grab the ball. Success. The sound sensor is definitely simple to work with in the Robolab system.
Light sensor
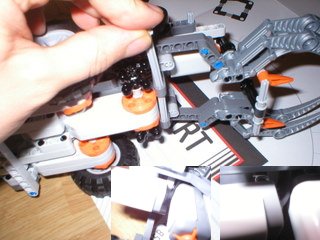
The first instruction here in the tutorial (Page 65 in the user guide) has a tricky part of pulling an axle from the axle holes in the bottom of the robot. Since these are a bit stiff, it is my recommendation to take the first part with the bushes out, then leaving one bush in the end, use it as a tool to push the other axle out. As you push it out of the first beam, you should be able to pull it from the other side easily. (See right)
Keep the parts around - it is only a temporary removal. You now have some cable routing fun - I am beginning to get the idea that the cavity behind the NXT is a good spot, bearing in mind that routing the flat cables from the front there does prop it up some. The slight flexibility of studless builds is actually showing a benefit there.
Oh - and once you have assembled the sub-assembly, plug it in before locking it in place. It is easier that way around. I am also not happy with the tightness of its fit against the touch sensor - a lot of strain on the connector (see the two images inset above right). Maybe I worry too much, but after years of using RJ plugs and cabling for telephone lines and networking in server rooms, I know that it does go…
Programming with the light sensor
With the Light Sensor fitted, I move on to seeing what kind of program challenge is next. I am now starting to get bolder with it, and tackle this one without having a peek at the help. I take the last program as a starting point, save it with a new name and modify it. This is when my laptop screen (1024 x 768) lets me down as the programming canvas is too small, there is also no zoom out feature. You can scroll with arrow keys or the pan tool, but there are no scroll bars. There is the map view however, in the bottom right corner, which helps a little here - not that the “Map Tab” always responds. Sometimes, if you have changed view in the main app, you need to switch to help, then back to map tab for it to actually show you the map after defaulting back to help and not actually setting the control. Others it is just blank.
I did find a short list of community found NXT-G bugs on the old nxtasy forums, which did mention the Map Tab issue I saw. The reporter recommends switching between that and help a few times. Perhaps Lego will release a software update to sort that one out. I could not find anything referring to it on lugnet, perhaps the lugnet.dearlego forum would be a good place to mention the issue.
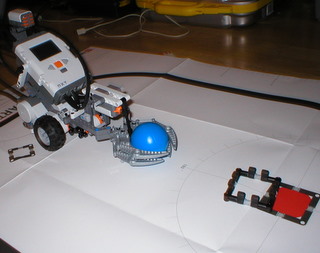
I had to determine how many revolutions a full turn round would be - I could either do it through trial and error, or another method. My solution was somewhere between. I used a small axle, and an orange Technic tooth, slotting one onto a drive wheel, noting how much they turn for a full two motor spin. This may have been overkill, as I later note that the tutorial program just reverses, then hits 370 degrees… It did the job close enough though -I got 370 for a result for both wheels. I did a full 180 degree spin on the robot. I also knocked the ball holder clear as unlike the tutorial code, my robot did not back off before spinning.
Amusingly, the sensitivity was good enough that it actually stopped when over one of the black marked out ball holder squares instead of the thick outer black line. A small tweak did the job. I am also beginning to notice that there is no quick key for compile and download.
Getting Ambitious
I then decided to try build a line follower program for the claw bot in its current state.
This is where I start to use the comment feature. I must admit- a text language is easier/quicker to move around in, as I am now having to pan a lot to fit my program in, and editing the text of a comment means switching tool, clicking the comment, editing it, and probably repositioning it. In a non-visual language, I just move to the line and type. I also find the variable references awkward, dragging lines. Deleting an erroneous line seems to be eluding me at the moment too. I also seem to have scope problems - I cant get a block inside an if block to reference a variable/value outside itself. Again- getting way ahead of the tutorials. I should slow down here, maybe come back later.
Next in the tutorials will be the Ultrasonic sensor - but you will have to wait…