How do you combine an Arduino robot with a Bluetooth module? We’ve built a kit based on this, and played with it in the Orionrobots lab.
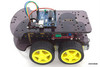
First - use the construction guide to build the robot then you will be able to add the bluetooth module.
Then plug it in using the following diagram:
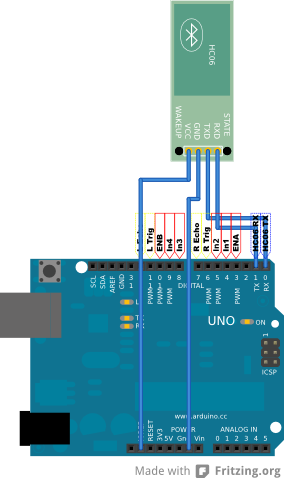
The module can easily be tucked into that top circle, or sticky tacked on to the robot - it’s location isn’t too important and it doesn’t require any rigid mounting.
Now its time to program it for basic RC. The code for this will work fairly simply:
Lets create this as an Arduino sketch, and we’ll add the libraries in later:
You will also need the TurtleMotors library - create a new tab in the Arduino IDE, call it TurtleMotors.h, and paste this into it:
You should now be able to compile and upload this to your robot, which will be waiting for a device to connect to it.
Driving it
To prepare an Android device, you will need a Bluetooth SPP app. The one I originally used is still available.
With the robot turned on, launch this and press the scan button. You should see “HC-06”, tap this and pair it with the code 1234.
Enter “Keyboard mode” on the next page. You will see buttons with the text clickMe on them. Open the app menu, and select “Buttons set” so you can program the buttons. click on the top-middle button to change its name and action. Name it ‘forward’, and the send value to ‘w’. Then click ok. Set the other buttons for left, back and right with the same ‘a’, ‘s’, ‘d’ values as above. When you’ve done all of those, use the menu to select “Buttons set complete”.
Bluetooth SPP sends a line-ending after each value, disable this from the menu using “set end flag” then “other”, and clear the value, then click ok. Use “set repeat freq” in the menu and set this value to 100 millis. Finally - change the trigger mode - to “Long press to send repeatedly”.
You can now use the buttons on this app to drive your robot!
A previous tutorial on this - Explorer Arrow Control gave the basics on bluetooth control.