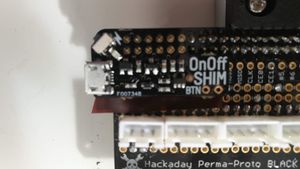
The robot I am repurposing for Piwars 2024 is repurposed from my 2019 robot Big Ole Yellow. This used a Raspberry Pi with an perma-proto hat. Before turning it on, I needed to understand the wiring, if it make sense or was the correct polarity. Simply powering this up if wires have gone awry could lead to damaging parts. Most connectors here are the locking polarised type, so I can be confident those are in the right way. However, some are just Duponts which could easily be in reversed. These are 4 way Duponts though, so could only be wrong one way. They also have a red-marked wire on them.
Top tip: Mark the connectors in some way to help reconnect them. A red stripe on one side would be useful.
I’ll need to look at my original circuit designs and check. There’s a Perma-Proto hat (a black hackaday branded one,but it matches the Adafruit layout) above a Raspberry Pi. I had some trouble loading the file, which had the Raspberry Pi and Arduino parts in one big half-baked Fritzing document.

The three middle connectors are for up to 3 ultrasonic distance sensors. For each, the left most pin is 3v3 and the right is ground. Good news - they are connected this way around.
The 4duino connector on the real board is a bit different. I elected to share only the ground, and not voltage with the 4duino this way. The 4duino is taking its power input from the motor power. I’ll tidy it up a tiny bit:

This more closely represents what is actually soldered. The Raspberry Pi connector is a bit obscured since there’s an On-Off shim soldered over this.

I think I should be able to power the Raspberry Pi side of this robot. What about the 4duino? I also had a proto-board above this, but I had not quite documented it as clearly.
However, I’m out of time for today.