For the last few months, I had the privilege of being a beta tester for the Pimoroni Yukon board. This meant I got to play with a robotics board with a tonne of features before it was released!
I got to experiment using my MicroPython skills, trying out the modules for controlling different kinds of motors, making sounds and lighting up lights. This was great fun!
What is the Pimoroni Yukon board?
The Pimoroni Yukon is a modular breakout board based around the RP2040 (the chip that powers the Raspberry Pi Pico). It comes with a chunky XT30 power connector, and a 3.3v regulator for the RP2040’s logic, so you can power it from a battery pack up to 17v and handle plenty of current.
It’s real magic comes in the form of 6 slots, which can populated by modules. The modules can be swapped in and out of slots, with proto-modules for you to make your own. Each module slot has options for I2C, SPI and UART data buses, PWM, simple GPIO and ADCs. My favourite modules so far are the regulated servo motor module, the Dual Motor module and the Audio Amp module.
Those that control power applications like motors, bench power supplies and audio come with monitoring of the current, voltage and temperature. This means you are less likely to damage things while operating the board.
It has power buttons, along with user buttons too, and a couple of LED’s too.
What have I done with it?
The Nerf Turret
Earlier in the year, you may have seen the short videos combining the Pimoroni Yukon board with the servo motor powered nerf turret. With this, I used my favourite modules, and my bench power supply to power it.
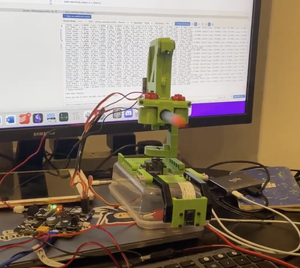
I started by adapting the bench power supply to the Yukon’s XT30, basically soldering an XT30 on some lengths of wire and connecting them to the croc clips of the supply. I should probably set up a more permanent solution, but this worked well for testing.
The Nerf turrets pan, tilt and fire mechanisms are all servo motor based, with tiny SG90’s for each degree of freedom. The regulated servo module was perfect for these.
There are then two simple DC motors for rollers to fling the dart out, which were connected together in parallel. This could use the Dual motor or single motor with encoder module. The important things here was that I could deliver lots of current (with current protection), and start/stop the rollers. In terms of speed, because they are tiny hobby motors, I kept them below 60% PWM so they didn’t burn out.
I ran into issues the first time I powered up the rollers, it turned out that one of the motors may have burned out previously and was exhibiting a dead short. the protection of the Yukon kicked in, powering it off. Perfect!
I had to swap it out for a new roller board - involving a tiny bit of soldering on the nerf turret, and then it worked perfectly.
This was great, but I started looking at the audio amp module, and thought it would be fun to have it say something before firing the darts in a small spread.
Effectively a button press on the Yukon would set the servo motors with the firing pin in the reload position, the tilt level and pan some amount to the left. It would then roll the line “Times up you Dirty Rat!”, then start the rollers (they need to be up to speed before firing), and then fire the darts. After each dart, it would wait a little, pan across a few degrees, and then fire the next one.
See Foam Dart Turret With Sound for more details of the code, and a video.
This audio playback inspired me to dig more at audio playback and recording with MicroPython and the RP2040, which also partly led to my I2S Playback with Raspberry Pi Pico post, where I refined and played with this concept and an external SD Card.

Other experiments
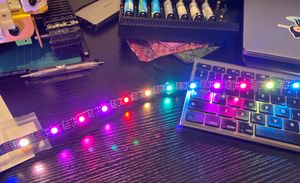
I connected it to big motors, small motors. I used the switched power with LED’s. I had a bunch of fun connecting different LED modules - getting an RGB strip going.
And then an RGB matrix:
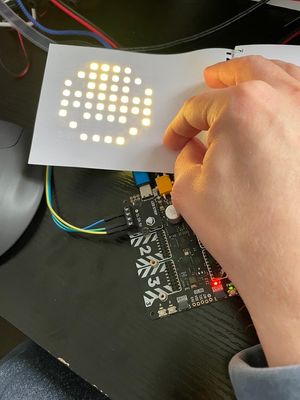
I used the LED RGB matrix, with a nearby notebook as a diffuser.
I checked, using my bench power supply how it behaved at different voltages, about 7v is great I found.
By playing with it, I found it was important to call the yukon_monitor functions for things to work well.
The PiWars 2024 Robot
The outputs on this are perfect for my PiWars 2024 robot, Big Ole Yellow (still not sure about this name, but it’s had it for a while now). The Dual motor module might be ok for the motors, but big motor plus encoders might be more suited?
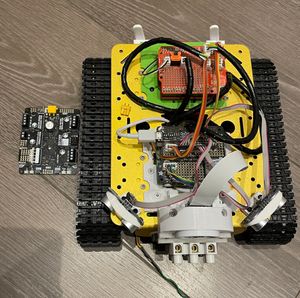
I have been adapting the Nerf Turret to set on top of this robot, along with designing other extensions, like a front grabber for the Eco-disaster challenge. These would be perfect for the Yukon’s regulated servo module and one of the motors modules.
I have some RGB LED strips, which again are perfect for a Yukon module, and adding sound might be fun too. One of the switched power modules can be used along with a resistor to control the large headlight LED’s either side of the camera. I wonder if the bench power module is enough for the Pi, or if I should still use the separate USB power?
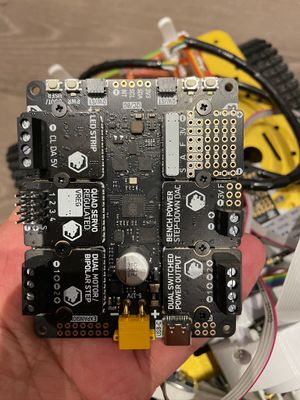
Either way, I’m yet to integrate this, but quite exciting about how much simpler and more powerful this will make the robots electronics.
I plan to power the Yukon from a set of 18650 battery cells, with a holder and separate charger. This fits well with the design, and keeps it pretty accessible for my student team.
This is all a bit hypothetical, and I’m wondering what to do with the HC-SR04 distance sensors it has, perhaps a prototype module, or they are swapped out for VL53LnX type sensors using the QW/ST connectors?
My overall thoughts
I am glad I got to be a Beta tester on this board, it is a lot of fun, and has a clear place in my next robot build. I’m looking forward to seeing what other people do with it, and what modules are released for it. And using that prototype module to hack my own.
Other links
For a hands on robot play with the Yukon, see Kevin McAleer and the Yukon in Is this the best robot ever? video.