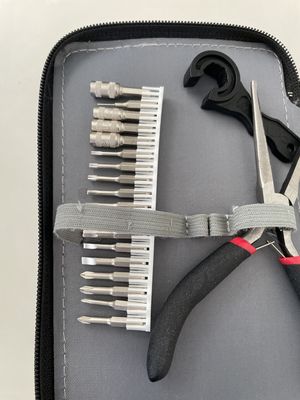
I am currently getting my Tiny Toolkit into a better state, as I use it frequently when doing robot tweaks in the office and out of the lab. This Tiny toolkit is designed for robot repair or improvements, either in my office away from my workshop, or out in the field.
I’ve also got an iFixit Manta toolkit. Inspired by https://tinytoolk.it/tools/ifixit-mako-4mm-screwdriver-kit/ I thought I could put this in my Toolkit, over the slightly rubbish screwdriver I had (something that came from merch at a conference).
Drew (the originator) has a 3D printable design for holding the bits, however it is designed for printing in TPU. My starting point was to try it in PLA and see what happened. The result wasn’t great, the bits simply weren’t going into the holder.
FreeCAD designs
I took the basic idea and created FreeCAD designs for a PLA version. It’s still a row of 18 bits. This uses the slight flex in thinner PLA structures, and appears to be working.
Design process
I started with sketches of a hexagon, constrained to 4mm in the narrow dimension. I created a further hexagon 1.8 mm offset out from the first.
I padded (extruded) this sketch to 12mm. I then skecthed a further hexagon, using this as a reference, and padded a 2mm base. Leaving a cavity above for the bit.
To make the PLA version, I then took cutouts. This was made by creating a sketch on top of the cavity, starting with bringing in the top as external geometry.
I created lines then, essentially a retangle on each edge, using parallel and perpendicular constraints to get the angles right. I then used equal and symmetry constraints to make sure they were all the same. I used this sketch as a tool to cut slots. The initial cut had slots on the straight edges leaving the corners only. I cut this only 10 mm deep, leaving 2mm of material towards the base.
I then used a chamfer to make each of the sides taper so the plastic could flex a little allow the bits to go in.
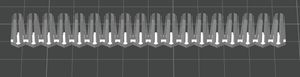
I then used a linear pattern to make 18 copies of the holder.
The first attempt printing this left the bits going in loose, and then catching on the 2mm at the base. The straight edges of the bit were aligning with the corners instead of the corners aligning.
Second attempt
The problems in the first attempt led me to change the cutting sketch, turning existing lines into construction lines, and tracing the corners. This mean that it was cutting the corners and leaving straight edges instead.
When printed, this held the bits in place, and aligned them to go mostly to the bottom. They were easy to slide in, but held firmly.
I am left seeing how long it will last and if the compliant parts will break. If they do, I can thicken them up a little and reprint it.
It is already getting a bit loose for some heavier bits.