Contents
- TL;DR
- What is Tailscale?
- Why Tailscale instead of mDNS
- Getting started with Tailscale itself
- Putting it on your robot
- ⚠️ Don’t change Tailscale config over Tailscale
- What the pyinfra script actually does
- Get a robot like this
TL;DR
The pyinfra script, .env.json template, and its own README live in the
tailscale_integration/ folder
of the Learn Robotics Programming, 3rd Edition
repo.
From the repo root, with the robot already set up for pyinfra access (chapter 18):
cp tailscale_integration/.env.json.example tailscale_integration/.env.json
# edit tailscale_integration/.env.json, fill in TAILSCALE_AUTHKEY
# (get a reusable key from https://login.tailscale.com/admin/settings/keys)
poetry run pyinfra inventory.py tailscale_integration/configure_tailscale.py
That installs Tailscale, joins the robot to your tailnet, and turns on Tailscale SSH — so from then on you can reach the robot by its tailnet name, from anywhere, whether or not mDNS can see it.

What is Tailscale?
Tailscale is a company whose service lets you connect your own devices together over a secure, private network — usually described as a VPN, though it works a bit differently under the hood to a traditional one. It’s fast, secure by default, and free for individual/personal use, which is the tier this integration uses.
This post only covers using Tailscale for this specific integration. For a fuller picture of how it actually works, see Tailscale’s own What is Tailscale? and How Tailscale works.
Why Tailscale instead of mDNS
mDNS (.local hostnames) is a great zero-config option for finding the
robot on your own network, but it has real limits:
- It isn’t reliable everywhere. Plenty of networks — some routers,
guest networks, campus/corporate Wi-Fi, VLANs — don’t pass multicast
traffic, so
.locallookups silently fail. - It only works on the same subnet. If your laptop and the robot aren’t on the same local network, mDNS can’t help at all.
- There’s often no fallback. Without mDNS and without access to the router’s admin/DHCP page, there’s frequently no easy way to discover the robot’s current IP.
Tailscale gives the robot a stable, known name/address regardless of the underlying network — and it’s mostly free for personal use.
Getting started with Tailscale itself
This post doesn’t repeat Tailscale’s own onboarding — their docs already cover it well:
- Tailscale’s own site for an account and the free-tier details.
- Getting started guide for installing Tailscale on your own laptop/phone so you have something on the tailnet to reach the robot from.
- Admin console → Keys is where you’ll generate the auth key the robot uses to join (see below).
Putting it on your robot
- Generate a reusable auth key at the Tailscale admin console. Reusable so re-running the deploy doesn’t fail on an already-spent key; tick pre-authorized to skip a manual per-robot approval step. This worked first time in testing — it’s not scarier than “create key, tick reusable, paste, done.”
- Copy the env template and fill it in:
Setcp tailscale_integration/.env.json.example tailscale_integration/.env.jsonTAILSCALE_AUTHKEYto the key from step 1..env.jsonis gitignored — it never gets committed.TAILSCALE_HOSTNAMEis optional; leave it blank to use the inventory hostname as-is. - Run the deploy from the repo root, alongside your existing
pyinfra
inventory.py:poetry run pyinfra inventory.py tailscale_integration/configure_tailscale.py - First-time gotcha — Tailscale SSH needs a one-time approval. The
script turns on
--ssh, so the robot accepts SSH authenticated via Tailscale. The very first SSH connection over the tailnet to a new device needs an interactive (browser) approval — a non-interactive pyinfra run can’t satisfy that itself. Do one manualssh <robot>over the tailnet yourself and approve it before pointing any further pyinfra run at the robot over its tailnet address. - If it fails with
invalid key: API key does not exist, the key’s been rotated or revoked since you generated it (this happened once in testing, reusing an old key from another project) — not a bug in the script, just generate a fresh key and re-run.
Re-running the script against an already-joined robot is safe: it skips the join step entirely once it detects the robot is already connected under the expected hostname.
⚠️ Don’t change Tailscale config over Tailscale
Once the robot is on the tailnet, it’s tempting to repoint pyinfra at it
over Tailscale for everything from then on — it works, and it’s the
whole point of doing this. But if pyinfra is connected to the robot via
Tailscale, and the deploy you’re running changes Tailscale’s own
configuration (a different tailscale up flag, a fresh/rotated auth key,
disabling --ssh, etc.), a failure or unexpected state change partway
through can cut the very connection pyinfra is using to make the change —
locking you out until you can reach the robot another way.
Rule of thumb: when you’re specifically changing Tailscale configuration, connect over mDNS or a plain LAN IP, not over Tailscale. Once the change is applied and confirmed working, it’s fine to go back to routing everything else over Tailscale.
What the pyinfra script actually does
configure_tailscale.py is self-contained — no imports from chapter-18 or
any other chapter, so it’s usable as soon as you have basic pyinfra access
to the robot working:
- Loads and validates
.env.json, failing loudly at plan time (before touching the robot) if the auth key is missing or still the placeholder. - Detects the robot’s OS release (
/etc/os-release) to pick the right Tailscale apt repository — this is genuinely automatic: it was written assuming Raspberry Pi OS Bookworm, but picked up Debian 13 “trixie” on the actual test robot with no code change needed. - Adds Tailscale’s own signing key and apt source
(the official install path, automated — not a piped
install.sh). - Installs a pinned Tailscale version and
enables/starts
tailscaled. - Checks whether the robot is already correctly joined (
tailscale status --json) before doing anything further — this is what makes a re-run a safe no-op rather than re-running the join dance every time. - If not already joined: stages the auth key to a root-only temp file
over SFTP (so it never appears in
psoutput or shell history on the robot), runstailscale up --hostname=<name> --ssh, then removes the temp file.
No --accept-routes — the robot doesn’t need to see other devices’ subnets
on the tailnet, just to be reachable itself.
Trusting Tailscale’s official packages
We’re installing Tailscale from Tailscale’s own official package repository, so we need to tell Raspberry Pi OS to trust that source. Two pieces work together here:
- The apt source is the address in Raspberry Pi OS’s package manager
(
apt) that tells it where to look when we ask it to installtailscale— this is where it downloads the package from. - The signing key lets Raspberry Pi OS check that a package it
downloads from that address was genuinely built by Tailscale, and not
swapped for something else along the way. It’s how
aptverifies “this package really did come from Tailscale, and nobody else,” rather than just trusting whatever the address hands back.
Together, these mean the robot only trusts and installs Tailscale packages that are actually from Tailscale.
What do we mean by “pinned”?
Tailscale ships regular updates to its own package. We do want those updates eventually — but on our own schedule, not automatically, in case a new version behaves differently than we expect and we’re not ready for it.
“Pinned” means the script asks for one specific version, not “whatever’s
newest”. That version lives in a single line near the top of
configure_tailscale.py:
TAILSCALE_VERSION = "1.98.2"To move to a newer version, change that line and re-run pyinfra — it’ll pick up the new pinned version and upgrade the package for you.
Worth knowing before bumping it: Tailscale’s version numbers work like a lot of software’s — the first number, before the first dot, marks a “major” version. If that number stays the same as the one you’re moving from, the commands and behaviour described in this post should still apply. If it changes, Tailscale’s own commands may have changed too — check their changelog before assuming everything here still holds.
What do we mean by “fail loudly”?
A common failure mode for scripts that automatically set things up is to half-configure them, silently, when a required piece — like the auth key here — is missing. If you don’t notice an error message at the time, you might not find out until later, when you actually try connecting to the robot and it doesn’t work.
“Failing loudly” means the opposite: the script checks for the auth key
before it changes anything on the robot at all — right after loading
.env.json, before any of the apt/systemd/tailscale up steps below
it:
authkey = env_config.get("TAILSCALE_AUTHKEY", "")
if not authkey or authkey == "tskey-auth-xxxxxxxxxxxx":
    raise ValueError(
        "TAILSCALE_AUTHKEY is missing or still a placeholder in .env.json — "
        "create a reusable auth key at "
        "https://login.tailscale.com/admin/settings/keys and set it there."
    )
If you forget to fill in .env.json — or just copy the example file across
as-is — pyinfra connects to the robot as normal, then stops dead before
touching it:
--> Connecting to hosts...
    [learnrob3.local] Connected

--> Preparing operations...
--> Preparing Operations...
    Loading: tailscale_integration/configure_tailscale.py

--> Disconnecting from hosts...
--> An exception occurred in: tailscale_integration/configure_tailscale.py:

Traceback (most recent call last):
  ...
  File "tailscale_integration/configure_tailscale.py", line 34, in
    raise ValueError(
ValueError: TAILSCALE_AUTHKEY is missing or still a placeholder in .env.json — create a reusable auth key at https://login.tailscale.com/admin/settings/keys and set it there.
No apt install, no systemd changes, nothing sent to the robot — just a clear, immediate reason and a link to fix it. That makes the problem easy to fix on the spot — generate or paste in the missing key and re-run — rather than debugging a robot stuck in an unknown, half-set-up state.
Get a robot like this
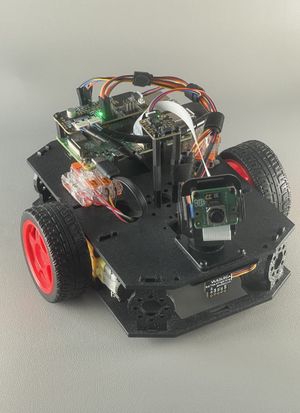
This integration targets the robot built in Learn Robotics Programming, 3rd Edition — build smart robot behaviours, learn PID, MQTT, camera and IMU sensor fusion, and more, all on Raspberry Pi.